Friday, 30 December 2011

nice light

nice light

melbourne is sunny and bright today, streaming lovely light into my printing room as i walked past it this afternoon...

a little art play after dinner

a little art play after dinner

and shining a little light on this monkey's overly enthusiastic, post dinner, marker play : )

Wednesday, 28 December 2011

rehash

it's been a crazy week, not only with holiday festivities but also a big girl with a bit of a stomach bug (and the sookiness and tantrums that go with the tiredness from being unwell and not eating much) and a little girl still growing the never-seeming-to-appear last eight teeth (and the erratic sleeping patterns and craziness that go with that) but finally i have a wee bit of time to write some words to go with the christmas images from the last two posts. i don't know if i will ever stop comparing christmas back home with christmas in australia, after seven years it is still slightly bizarre to me to bake gingerbread accompanied by the smell of freshly mown grass wafting through an open window or have my three year old be able to test out her new scooter in a tutu and tank top at 7am on christmas morning. christmas here is different. festive, fun and good but not the same as the atmospheric holiday i grew up with. i made roast turkey with all the usual trimmings for christmas lunch and, while tasty, i think next year we'll opt for some classic aussie seafood instead. running the oven for hours on end when it's 30ºC outside just seems a bit crazy. and i think we'll come up with another tree option next year. we had my first ever real tree this year and while the piney smell for the first few days was divine, the baby spider infestation that i had to tackle using toxic bug spray really tipped the scales in the favour of fake for me.

nutty kids and spider invasions aside, we really had a lovely christmas. i made each of the girls new, summer pj bottoms for christmas eve (soph is wearing hers in the christmas morning photos, mae thought hers were too big so opted for mama-made tights instead) and a handmade gift for each of them christmas morning. sophie recieved some bead-adorned felt cookies for their play kitchen (inspired by these) and mae finally got the doll i made her months ago, complete with matching pjs and tutu (which were SO FUN to make!). and now the crazy, last minute making and sending is behind me, the festivities are finished and the house is slowly getting back in order, i'm getting excited to ring in 2012. lots of planning and scheming, as per usual : )

oh and my husband got me some kick ass vintage lighting for my sewing/printing room, remind me to get a photo of those to share!

Sunday, 18 December 2011

mix

ink swatches

colour palettes

colour palettes

colour palettes

i spent some time mixing colours this weekend and then arranging the swatches into palettes for some quilt kits i have circling in my mind. so fun. i could seriously mix colours all day*. love.

*maybe not every day.

Saturday, 17 December 2011

create your own screen::tutorial

okay, so here's the run down of how to create a screen for printing using an old picture frame, mesh and some simple household tools.
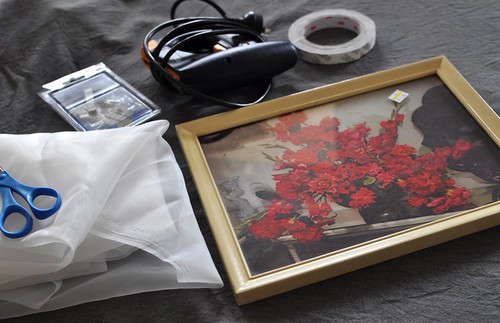
screen tut1
what you need:
old picture frame (thrift shop)
pliers
scissors
screen printing mesh (i found mine on ebay or a google search will turn up lots of options)
staple gun (hardware store)
heavy duty 6mm (1/4") staples (hardware store)
good quality double sided tape (hardware store)
cloth tape (hardware store)

screen tut2
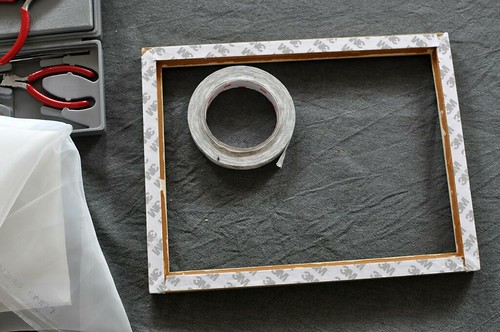
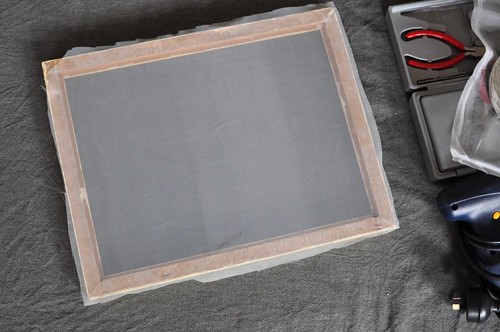
remove the glass (keep the glass if you plan on doing a photo emulsion on the screen once it's done) and backing from your frame and use the pliers to remove any leftover bits of hardware (nails, staples, etc). then apply a strip of double sided tape to each side and leave the backing on;

screen tut3
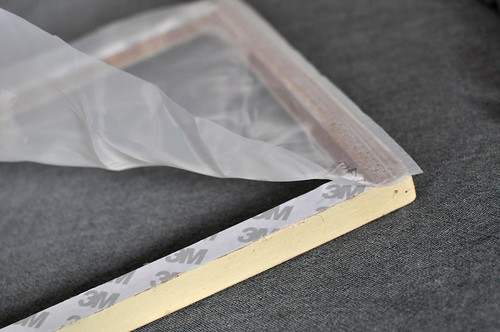
cut your mesh to the size of your frame. peel off the backing to one side of the double sided tape and adhere the mesh to that one side, as evenly and straight across as possible,and really stick the mesh into the glue left behind from the double sided tape so that it will hold;

screen tut4
peel the backing off the tape at the opposite side and adhere that side as well, trying to keep the mesh as straight and taut as you can. then peel off one side at a time and stick the mesh down. you want to keep the mesh as even and taut as you can when doing each side but the final side is where you will really see the results. pull it as tightly as you can, as evenly across as you can;

screen tut5
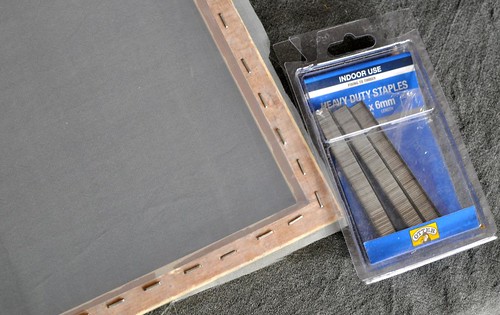
once you are happy with the tautness, use your staple gun to staple the mesh into place, stapling every couple of centimeters (half inch) or so;

screen tut6
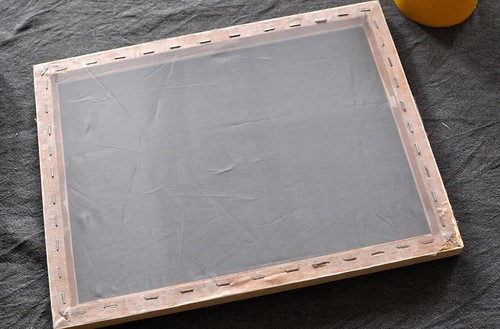
neatly trim off the excess mesh hanging off the sides of the frame;

screen tut7
use the cloth tape to cover the staples. have the tape overlap the mesh by a couple of centimeters (depending on the size of your screen) so that when you tape the front for printing, the tape edges will line up on both sides;

screen tut8
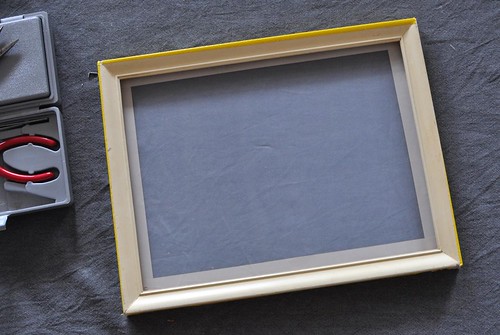
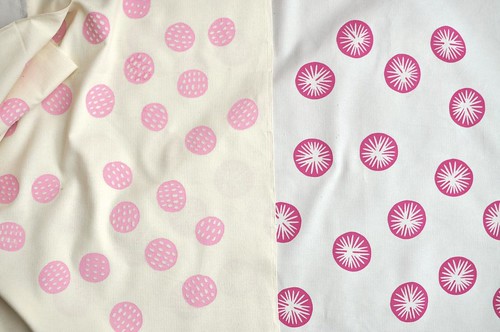
done! now this screen is ready for painting on with screen filler or a photo emulsion treatment : )

hope this helps anyone who wants to muck around with screen printing without having to outlay too much money. it really is super simple. getting the mesh taut is probably the hardest part but you get the hang of it pretty quickly. please let me know if you use this tutorial for some printing of your own, i'd love to see your results!

Thursday, 15 December 2011

dark chocolate gingerbread brownies

 dark chocolate gingerbread brownies
Ingredients
200g butter
1/2 cup cocoa
2 cups dark brown sugar
100g dark cooking chocolate (about half a big block)
1 tsp vanilla
1/2 tbsp finely grated fresh ginger
1/4 tsp ground cloves
1/4 tsp nutmeg
1/2 tsp cinnamon
1 cup plain flour
2 eggs
1/2 cup dark cooking chocolate chunks (or melts or chips)

Method
Preheat oven to 180ºC and line a standard slice tin with baking paper. Over a very low heat melt butter, dark chocolate and cocoa gently in saucepan. When well combined and smelling all chocolate like, stir in the dark brown sugar and vanilla. Take off heat, add spices and stir well.

Sift in flour and mix well. Add in the eggs and beat on med/high for 2 minutes. Add dark chocolate chunks and stir through.

Pour into lined slice tin and bake 20-25 minutes. You'll know it's done when the top slightly cracks and a toothpick comes out mostly clean. Sprinkle with icing sugar for easy prettiness if needed.

*adapted from suzie's classic and amazing brownie recipe.


Wednesday, 14 December 2011

city excursion

first letter to santa

city excursion

city excursion

city excursion

city excursion

city excursion

city excursion

city excursion

city excursion

city excursion

we took the train into the city today, to meet up with a bunch of friends, drop our letters into the official santa mailbox (apparently we will get a reply!), have a visit with the big man himself, run through the trees in fed square, check out the gingerbread village and the myer christmas windows, then back home again. fun but exhausting, especially with the little one sporting a minor case of the grumps (could be the eight teeth she is growing, they are certainly causing sleep havoc lately).

*yes the santa letter is a little brief, it was scribbled out about 5 minutes before we left. and no, i don't know what the cuckoo thing is all about. she added it to her wish list of bike and scooter a couple of weeks ago and it seems to be sticking. hope she's not too disappointed christmas morning...

Tuesday, 13 December 2011

decemblur

woah, this is a busy time of year, hey??

xmas craft kits

new maze & vale cushion covers

making wrapping paper

skirt for mae


we've been making all kinds of stuff!

Wednesday, 7 December 2011

from scratch

pinks

spotty dots

in between the holiday/new shop/market/daily life madness of the past couple of weeks, i've still eked out a bit of time to entertain my desire for new designs. i've even taken it to the next step and have been creating the screens themselves, from op shopped picture frames and screen printing mesh that i ordered on ebay, then painting the designs on with speedball screen filler. it's a pretty great and cheap way to muck around and try out new stuff. the photos show the {very rustic} screen i made this week, trying to replicate a design i first carved as a stamp back in august and then the results of that screen plus another of my designs printed in pinks on super soft pinwale corduroy for a couple of custom oobees.

christmas tights

and some very festive tights i made for mae using another new screen i created last week. teeny little confetti-like squares make me smile. i hope to mesh a couple of larger frames tomorrow but next time i do a smaller one, i'll take photos to do a little tutorial, it's really pretty simple once you've got the supplies.

Saturday, 3 December 2011

sale, sale, sale-ity, sale


i've drastically reduced the prices on the few remaining oobees and quilts in my onegirl shop so head on over and snag yourself a handmade, holiday bargain. this shop will officially be closing for good on december 22nd!

Thursday, 1 December 2011

best laid plans

so today is the first day of advent and you know what? no calendar action happening at our house. that's not to say that we won't still be doing an activity every day anyway (christmas book today) or that i won't somehow pull a calendar together in the next few days but i got myself all muddled up in design ideas and missed the official start date. the other thing holding me back is i'm not sure how the three year old is going to take the whole thing anyway. she's going through a particularly questioning and argumentative stage and i can just see every advent opening as an invitation for a litany of "i want to do it NOW"s and "let's open another one, mommy"s and really, i have enough things to repeatedly explain to her all day. so i may just stick to the fun activities and let myself off the advent hook until next year when she'll be better able to grasp the whole countdown thing. or maybe we'll just count down the last seven days before christmas this year and see how that goes.

diy crayons

and in another epic mommy-fail, we tried to make crayons yesterday. you know, the ones you see all over the internet? where you take broken up crayons and put them in a silicon mold and then into the oven or microwave or outside in the hot sun? and they melt and then cool and you have these really cool shaped, like-new crayons? yeah, well.

diy crayon fail

it started off well. my mold said it was okay to freeze or put in the oven or the microwave so that was all good. i contemplated microwaving them but worried about exploding crayon splatters and we had the oven on anyway as we were going to make cookies so opted for the oven. put the mold in, watched it melt, all happy and good. then it came time to take them out and i realised my error. flexible silicon mold full of molten crayon = very hard to remove from oven. i should have just let it cool in there but, you know, i had a three year old begging to make cookies so i tried to slowly pull the mold out onto a tray and well, you see the result above.

fail.

cookies were good though : )

LinkWithin

Related Posts Plugin for WordPress, Blogger...